Here is the tutorial of setting up your RPi for first boot, I'm going to share what problem i encountered during my setup as well so that you guys know what to do when you see the same problem. This tutorial is meant for Model B RPi NOOBS setup and assume you will use Window PC for setup. I hope you find this tutorial useful and informative. Enjoy!
Setting up SD card for first boot (NOOBS Setup)
Depends on the RPi package you purchase, some of the package comes with a SD card with RPi logo on it, some comes with the only RPi. For me, i purchase the package with 8GB SD card included, it is actually a micro SD to SD card slot + 8GB micro SD card. Click HERE if you want to find out how it looks like.
Let's start with a list of items required for initial setup. You can download the software required first as it will take a while (~1.3GB total). You can read the documentation in link below while waiting for download to complete.
Hardware required:
(i) PC with Window XP / Win 7(ii) SD card reader
Software Required:
(i) SD Formatter v4.0 for Window - Click HERE to download(ii) Download NOOBS 1.3.7 from RPi Web - Click HERE
Documentation:
(i) RPi Quick Start Guide V2 - Read HERE
(ii) RPi NOOBS Setup - Read HERE
Once you have download everything you need
1. Install SD Formatter v4.0 to your Window PC.
2. Plug in SD Card to your SD card reader and connect to your USB.
3. After window detect your SD card, inspect the content of the SD card. Some SD card already comes with NOOBS and OS installed, How to identify it?
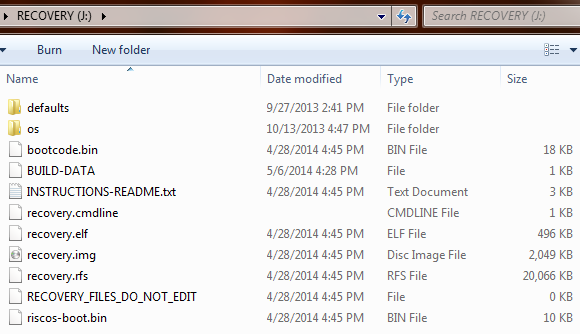
- Assuming you are using Win7, you should have detect one logic drive (~1GB in disk size) and it got NOOBS content inside the logic drive. (Refer to Figure1).
 |
| Figure1: SD Card with name "Recovery" & 1.38GB Size |
- If you see the 1GB drive please click Window's logo at bottom left of your screen, right click on "Computer" and click on "Manage" context menu. You should see Computer Management application start up in a short while. (Refer to Figure 2)
- Click on "Disk Management", wait for a few seconds until you see a list of your PC's disk drive. (Refer to Figure 2)
- If you notice there are two unknown logic drive (disk drive without name) in the list under your SD card, that's the Raspberry Pi's OS drive. It means your SD card already have RPi OS installed. (Refer to Figure 2)
 |
| Figure2: The RPi OS Partitions |
- Note** If you found the RPi OS in the SD card, you can skip and go straight to "Readying Your Raspberry Pi for First Boot" Section. If you like start fresh you may continue to step 4.
- Select the drive letter of your SD card.
- Click on "Option" button and select "Format Type" to "Full" and "Format Size Adjustment" to "On".
- I recommend to use the full format for first time setup. This will take a while so please wait for the program to complete format the SD card.
 |
| Figure3: SD Formatter 4.0 Interface. |
6. Now extract the content of the NOOBS archive you have downloaded and copy all the files and folder to you SD card. (Refer to Figure 4 and 5)
 |
| Figure4: Extract All Files from NOOBS_v1_3_7.zip and copy them |
 |
| Figure5: Paste the files in SD card |
Readying You Raspberry Pi for First Boot
Once you complete setup your SD card, you are almost ready to boot up you RPi. Here are the list of hardware you should prepare before proceed to do so:
(i) USB Keyboard (Recommend not to use wireless keyboard)
(ii) USB Mouse (Recommend not to use wireless mouse)
(iii) TV with HDMI or RCA port
(iv) HDMI or RCA cable (Recommend to use HDMI for first boot)
(v) Micro USB cable
(vi) Smartphone charger with 5V 1A rating.
Note** According to RPi web sites, your power supply require to have 5V, 700mA to 1000mA in order to make RPi work properly. So normal smartphone charger should be able to provide that power. However, you need to double confirm by looking at your smartphone charger power rating at the back of the charger. Every charger should have it. Make sure its stated 5V 1000mA / 1A. If no power rating on your charger, don't use it! It might damage your RPi. Refer to Figure6 for more detail.
Now lets connect the parts together. Here are the steps. But i must let you know first, powering up your RPi should always be the last step. Otherwise your RPi will not work properly =)
1. Connect HDMI or RCA cable to your TV.
2. Connect the other end of the HDMI or RCA to your Raspberry Pi.
3. Connect USB keyboard and USB mouse to your RPi.
4. Turn on your TV and switch to HDMI / RCA channel.
5. Connect your smartphone charger and RPi
Here is the picture of how it is connected.
You might notice my RCA connector is Red, that's because that's the only RCA cable lying in my house, the usual RCA connector for video feed suppose to be yellow. So don't get confuse. It doesn't matter what color it is as long as it can connect to your TV RCA connector properly.
6. Finally, turn on your smartphone charger to boot up RPi.
Now for those of you who use HDMI port, you should see NOOBS booting up on your TV and prompt a box to choose which OS to install to RPi. But...
For those who use RCA port, you should be getting a black screen instead. Don't worry, follow steps below:
Now that you get the video feed on TV, NOOBS should be up by now and you can choose which OS to install (Figure 8). For first time user, i recommend to install Raspbian to get familiar with how RPi works. I find the information on Raspbian is more on the net as well. So use your mouse to click on "Raspbian" check box and click "Install (i)" on the upper left of your screen. A progress box should be up by now. You have to wait for a while as it will takes some time to install the Raspbian.
Once installation of Raspbian is complete, you should see Figure9 on your TV, if you are using HDMI. You can configure your time zone and keyboard layout. The rest of the options let's leave them alone for now. Use your keyboard to navigate, when complete, press "Tab", select "Finish" and press enter. You should be able to continue boot to Raspbian.
Edit: I recommend to enable ssh by navigate to Advanced Options and press enter, select SSH and press enter and enable it. This will enable you to connect to your RPi remotely. I will cover this SSH option in the next post.
Once you complete setup your SD card, you are almost ready to boot up you RPi. Here are the list of hardware you should prepare before proceed to do so:
(i) USB Keyboard (Recommend not to use wireless keyboard)
(ii) USB Mouse (Recommend not to use wireless mouse)
(iii) TV with HDMI or RCA port
(iv) HDMI or RCA cable (Recommend to use HDMI for first boot)
(v) Micro USB cable
(vi) Smartphone charger with 5V 1A rating.
Note** According to RPi web sites, your power supply require to have 5V, 700mA to 1000mA in order to make RPi work properly. So normal smartphone charger should be able to provide that power. However, you need to double confirm by looking at your smartphone charger power rating at the back of the charger. Every charger should have it. Make sure its stated 5V 1000mA / 1A. If no power rating on your charger, don't use it! It might damage your RPi. Refer to Figure6 for more detail.
 |
| Figure6: Smartphone Charger with recommended Power Rating |
Now lets connect the parts together. Here are the steps. But i must let you know first, powering up your RPi should always be the last step. Otherwise your RPi will not work properly =)
1. Connect HDMI or RCA cable to your TV.
2. Connect the other end of the HDMI or RCA to your Raspberry Pi.
3. Connect USB keyboard and USB mouse to your RPi.
4. Turn on your TV and switch to HDMI / RCA channel.
5. Connect your smartphone charger and RPi
Here is the picture of how it is connected.
 |
| Figure7: RPi Connections to Hardware |
You might notice my RCA connector is Red, that's because that's the only RCA cable lying in my house, the usual RCA connector for video feed suppose to be yellow. So don't get confuse. It doesn't matter what color it is as long as it can connect to your TV RCA connector properly.
6. Finally, turn on your smartphone charger to boot up RPi.
Now for those of you who use HDMI port, you should see NOOBS booting up on your TV and prompt a box to choose which OS to install to RPi. But...
For those who use RCA port, you should be getting a black screen instead. Don't worry, follow steps below:
- Look at your RPi, you should see a red LED light and another flashing green LED light.
- Wait for green LED light to stop flashing. It should take only a few seconds.
- Tap "Num Lock" button on your keyboard to make sure keyboard is working. You should see "Num Lock" LED light up when you tap it.
- Now press 3 or 4 button on your keyboard. You should be getting your video feed now.
 |
| Figure8: NOOBS, Choose which OS to install |
Now that you get the video feed on TV, NOOBS should be up by now and you can choose which OS to install (Figure 8). For first time user, i recommend to install Raspbian to get familiar with how RPi works. I find the information on Raspbian is more on the net as well. So use your mouse to click on "Raspbian" check box and click "Install (i)" on the upper left of your screen. A progress box should be up by now. You have to wait for a while as it will takes some time to install the Raspbian.
Once installation of Raspbian is complete, you should see Figure9 on your TV, if you are using HDMI. You can configure your time zone and keyboard layout. The rest of the options let's leave them alone for now. Use your keyboard to navigate, when complete, press "Tab", select "Finish" and press enter. You should be able to continue boot to Raspbian.
Edit: I recommend to enable ssh by navigate to Advanced Options and press enter, select SSH and press enter and enable it. This will enable you to connect to your RPi remotely. I will cover this SSH option in the next post.
 |
| Figure9: Rasp-config for First Time Use |
Additional Info: RCA Port Troubleshooting
Now for those of you who use RCA, if you see only a black screen for a long time after Raspbian installation complete, then bad luck. You got more work. Other wise you can skip this entire section on RCA troubleshooting if you can see Figure9 on your TV.
I'll explain briefly on how to fix this. You need to do a hard reboot (Turn off the power supply to RPi), and boot into NOOBS, (ie recovery mode for RPi) to edit the config.txt file for Raspbian (The instruction for RPi to follow during Raspbian boot) to force turn on RCA video output, and the tricky part is you have to boot into NOOBS without a TV output. Yeah =) So carefully follow the steps below:
- Wait for green LED light to stop flashing and red light stays constant.
- Turn off your smartphone charger (Do not pull out the micro USB cable from RPi !)
- Put your finger on left "Shift" button on Keyboard (Just do it trust me =D )
- Turn on smartphone charger again, wait for 3 to 5 seconds, then press and hold the left shift button.
- You should see the green LED flash for a moment, then you can release the shift button and press 3 or 4 button. You should be able to get a TV output by now and you will see Figure8 on your TV again.
Congratulation! you have successfully boot into NOOBS again. You should be able to see Figure8 again. There are still more works to make sure RPi output video on RCA port. So stay with me for just a little bit. Here are the steps.
- Select "Raspbian", by now you should see "Raspbian" is installed, click on the "Edit Config" on top left of the screen. You should be able to open the config.txt file for Raspbian.
- Check on the lines that doesn't start with "#" character. If it is contain with "hdmi", add a "#" character at the beginning of the line. This will disable anything to do with HDMI configuration during boot.
- Check for the lines that begins with "sdtv", that is your RCA configuration. Remove the "#" character in the beginning of the line.
- Insert these two lines "sdtv_mode=2" and "sdtv_aspect=3" if you cannot find it in your config.txt file. This will set your RPi to output video of Normal PAL standard for TV with aspect ratio of 16:9. If you want aspect ratio of 4:3, change second line into "sdtv_aspect=1"
- Search for lines with "overscan", remember to remove the "#" character.
- Finally, search for line with "disable_overscan", again, remove the "#" character. Make sure to set the disable_overscan to 0, ie change the text to "disavle_overscan=0"
- Save the config.txt file and press "Esc" button to continue booting Raspbian.
Botting Up Raspbian GUI
| Figure10: The mystery word > pi@raspberrypi ~ $ |
Once you complete configuration for Raspbian, it will continue by showing you its command interface. If it ask you for login, please key in "pi" as username and "raspberry" as password. You should see Figure10 once you successfully login to Raspbian. Type "startx" and press enter to begin GUI session. Now you should see Figure11.
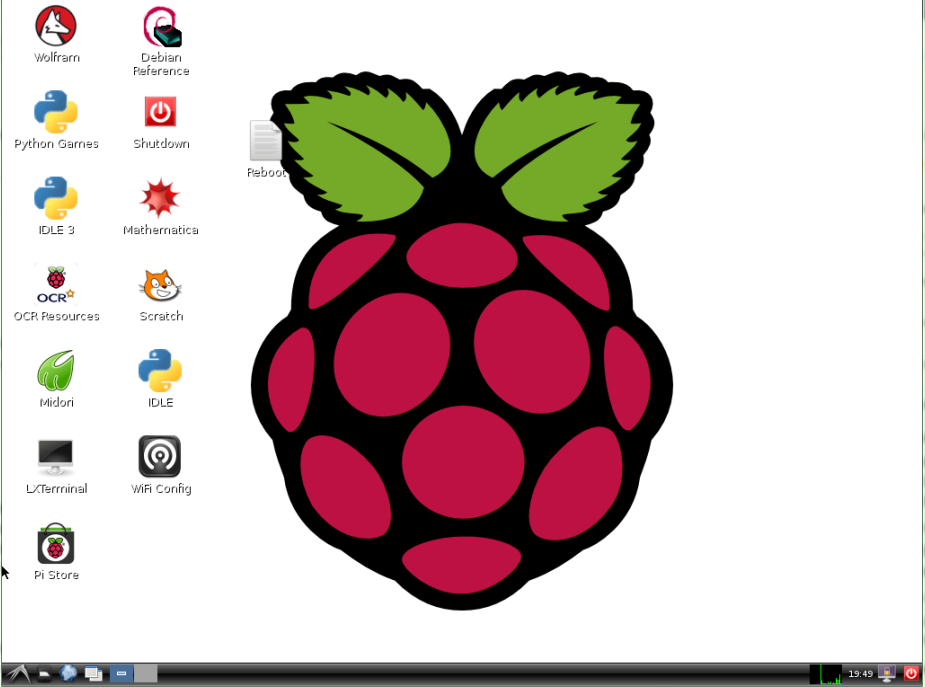 |
| Figure11: The Final Goal! |
Congratulation! You have successfully booting up your RPi with Raspbian! Go ahead and navigate around. Get yourself a beer for your success, you deserve it. =)
I'm very happy if you are reading this tutorial until here. I hope all this information is helpful for you =) feel free to drop a questions in comment if you need more info. I'll try my best to answer you.
You may read my next post on how to configure your RPi video output HERE in case your display still got problem. Happy tweaking your RPi!
Disclaimer: Please use this tutorial at your own risk. I am not responsible for any damage to your RPi or you. Cheers =)
Reference:
1. http://elinux.org/RPi_config.txt
2. http://elinux.org/R-Pi_Troubleshooting#Composite_displays_only_back_and_white_or_no_image
No comments:
Post a Comment