Showing posts with label Unboxing. Show all posts

Sunday, July 3, 2016

Raspberry Pi 3 Unboxing!

Its been a while since my last post, was busy working on stuffs and finally got some time to do this again.

The Raspberry Pi 3 unboxing! Finally got my hands on one of the device and got a chance to take a few pictures.

Here you go. Enjoy the pictures!

Figure 1: The long awaited Raspberry Pi 3 in the box

Figure 2: The Pi Casing from RS
Figure 3: Taking apart the casing. Looks and feel sturdy than my last casing
Figure 4: Pi 3 board itself, HDMI angle
Figure 5: Pi 3 board, GPIO angle
Figure 6: Pi3 board, USB angle
Figure 7: Pi 3 board bottom view
Figure 8: Pi 3 board sitting on top of bottom casing
Figure 9: Pi 3 board with middle casing on top
Figure 10: Pi 3 with top casing mounted


Here is what i have for today! Overall the casing is quite solid, the top casing can be taken off easily to allow peripherals connected to the board, i think there is some room to place a fan as well. The casing won't slide easily when place on top of slippery surface due to the rubber at the bottom casing.

I managed to power up the Pi 3 as well, overall i did feel the startup speed improves compared to Pi 2, but based on my one day experience with Pi 3, generally i would say performance won't be a lot faster compared to Pi 2, maybe until we got a x64 raspbian available then we can know for sure. =)

Hope you enjoy the post! Thank you for reading!

Wednesday, December 31, 2014

Raspberry Pi Model B+ Unboxing!

Hi guys, it been a long time since i last update this blog. Here is something new for you. The Model B+ unboxing!

I've purchased this from element14 as well. Same purchasing procedure like my model B post here.

So without further delay, some pictures for you to see.

Element14 Packaging
The stuff inside the box


MC-RP002-CLR Pi casing, Wifi Module and Pi Model B+
Removing the plastic covers...

Here are some views from different angle of model B+...

B+ Side View 1: Micro USB, HDMI & RCA port
B+ Side View 2: LAN & USB ports
B+ Side View 3: The GPIOs
B+ Close Up Top View: The SMTs and BCM SoC
B+ Back View: The micro SD card slot
B+ with the casing and WiFi module installed
Powering on The B+

Here is a simple review on the casing, MC-RP002-CLR enclosure is pretty easy to use. It doesn't require a lot of work to install. The installation is available for download in the element14 page. 

Cons:
  1. The B+ board doesn't sit tightly in the casing, it still have small room for the board to move around inside the casing. 
  2. Don't ever drop the your B+ with the casing. Feels like it is going to break it you exert too much force.
Pros:
  1. You must install the rubber pad beneath your casing, it sits firmly on the desk and won't move around easily.
  2. Dust proof =)

That's it. Hope you enjoy this. Happy 2015!

Monday, June 16, 2014

How to Purchase Raspberry Pi & Ship to Malaysia (Include Unboxing Pictures!)

Few days ago while I'm reading some magazines in a book store, i came across an article about a little device called Raspberry Pi. A mini computer developed in UK that runs with ARM processor, similar to the one used in smartphones. I did a little search online and i was very interested in what this little computer is capable of, and of course, it is very cheap! (~RM130)

I'm going to share to you how you can buy a Raspberry Pi online and some pictures while i unbox the package. I got mine through element14. (Formerly Farnell) Here are some steps you need to go through to purchase the device.

1. Go to http://my.element14.com
2. You need to register an account for element14. Its free. Click "Login / Register" and follow instructions.


Figure1


3.You can search for "Raspberry Pi" and it will return a few results. There are several choices available for you, depends on which bundle you choose. You need to check whether the bundle you choose is available or not before add it to your shopping basket. For me i choose the Raspberry Pi that comes with 8GB SD card.


Figure2


4. When you done choosing items that you want, click on the "Shopping Basket" in Figure1, you will see a list of items you choose. Double confirm all the items in the list and click "Check Out". You can pay by credit card or Maybank2u. There is a list of instructions available on top of the page if you want to pay by Maybank2u.


 Figure3


5. There will be a series of infos you require to fill in including the shipment address, contact number, etc. Follow the instruction carefully and confirm order once you done.

6. Once you complete step 5, you can track your order in "My Account" link and its status. Element14 require to confirm your payment first and then it will start process your order. For me, it took 3 working days for the package to reach my place once confirm payment. Its pretty quick =D


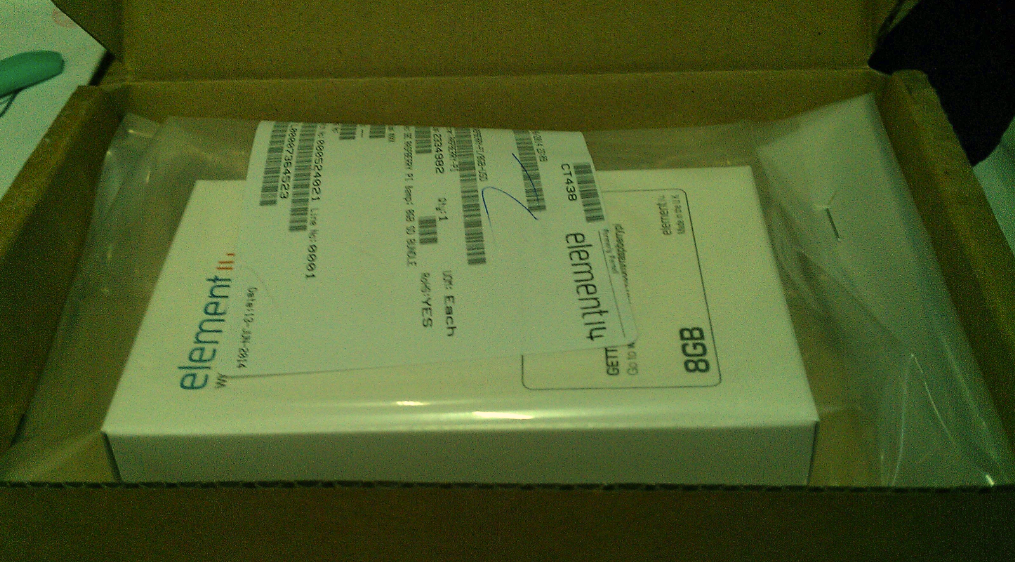
Here are some pictures while i unbox the packages. Enjoy!


Figure4: The Package (Sorry for the censoring XP)


Figure5: How it Looks Inside

Figure6: More Box...

Figure7: Ah Ha! Finally the board in ESD bag and the Safety Note.

Figure8: Side View of the Raspberry Pi

Figure9: Another Side View of the Raspberry Pi


I hope this blog is informative enough. Thanks for reading! Feel free to drop some comments if you need more info.